
After what might have been too much forethought, research and opinion gathering we finally had the materials, tools, ideas and time to tackle the leaking port side deck core that has plagued our boat since about the time of hurricane Sandy.
While I have tinkered with West Systems epoxy since I was in my 20’s, this would be a rather large project for me to undertake. As a warm up for what was to come I decided to make up some backing plates for when the stanchion would be re-bolted through the deck. I made up a mold from scrap wood in Matt’s garage and used a few pieces of broken laminate from destroyed boats I had found after hurricane Sandy. I sprayed the flashing with a mold release agent and duck or duct tape helped seal the seams. The reddish tint of one of the backing plates resulted from using an old can of hardener while the clear one used hardener only from a new can.
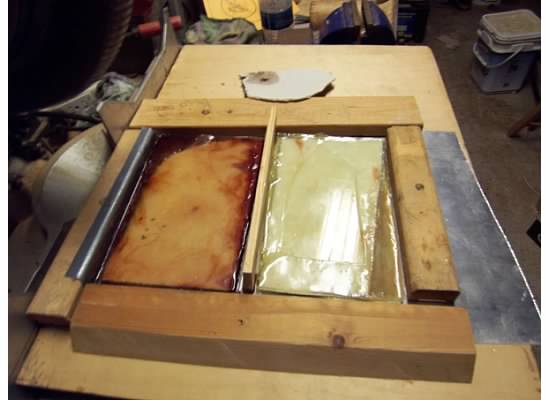
These backing plates will come up again later.
The first step was to cut the upper skin of the deck and attempt to peel it back without breaking it.
The upper skin came up easily in some spots and not so easily in others. What we discovered once the outer skin was peeled up was that the Balsa core was unevenly rotted throughout the area: the worst rot occurred at the lowest spot of the deck near the toe rail but some sections were completely rotted to the edge of the dog house roof. The following picture shows where we found some stubborn bits of Balsa core.

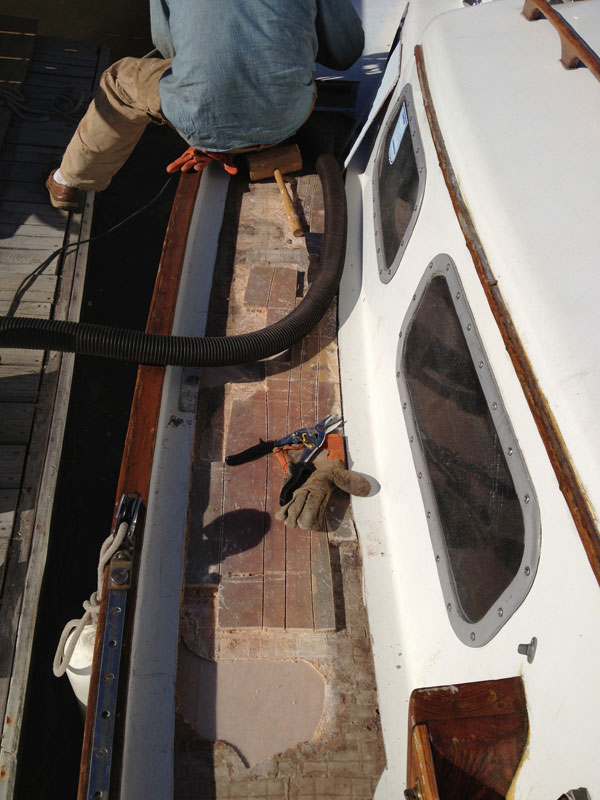
To add to my misery the primitive tools we were using (hammer & chisels) helped to remove a few sections of the inner skin that was already compromised. The whitish section near the boat fender shows where the lower skin was removed and wax paper was propped up by plywood and dead men inside the cabin waiting for me to re-pour the inner skin.
Seeing all this rotted Balsa core I became more worried that the core near the chain plates was rotten so I extended the recore project just forward of the chain plates. I was somewhat relieved to find that either a solid piece of wood or ply was used for a core material in this area. It was not bone dry but it was pretty solid. This photo shows how far forward we went with cutting the outer skin.

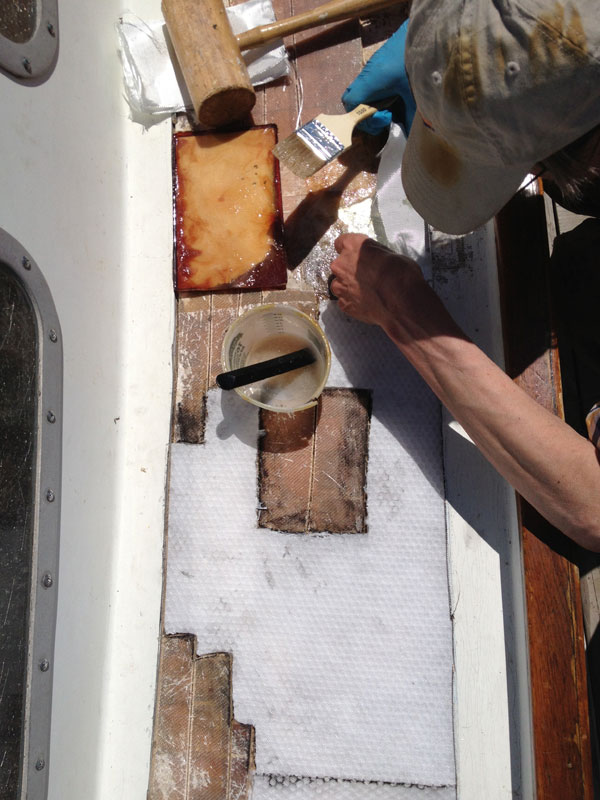
Upon reflection I will say that we were missing one crucial tool that would have been quite useful: a router with a 1/2″ vertical cut with a bearing on the end. With a tool like this I could have removed the last stubborn bits of Balsa core which would have made putting in new core quite a bit easier. Since we were using the polypropylene honeycomb core material that my new friend Howard Crisp recommended we could use a sharp razor to cut out the more interesting shapes that were needed to fill the voids we had created. This picture shows the odd shapes of pieces of new core we added.

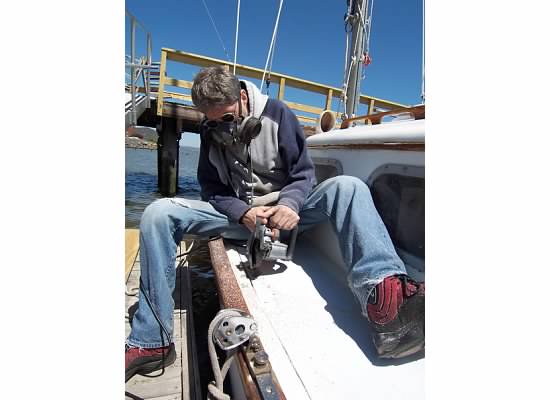
The polypropylene honeycomb core is great stuff and I highly recommend it as it costs about the same as a good plywood. Its only short coming that I can fathom is that, like Balsa, it should be drilled and filled with epoxy where any penetrations go through the deck. This would be the case where the offending stanchion base once stood. Instead of drilling and epoxy filling I decided to use one of my pre-made backing plates for core under the stanchion base. You can see me contemplating the idea in this photo.
By using a solid core in this area there was no need for drilling and filling prior to installing the stanchion base. The other backing plate was used inside the cabin to support the same stanchion base.
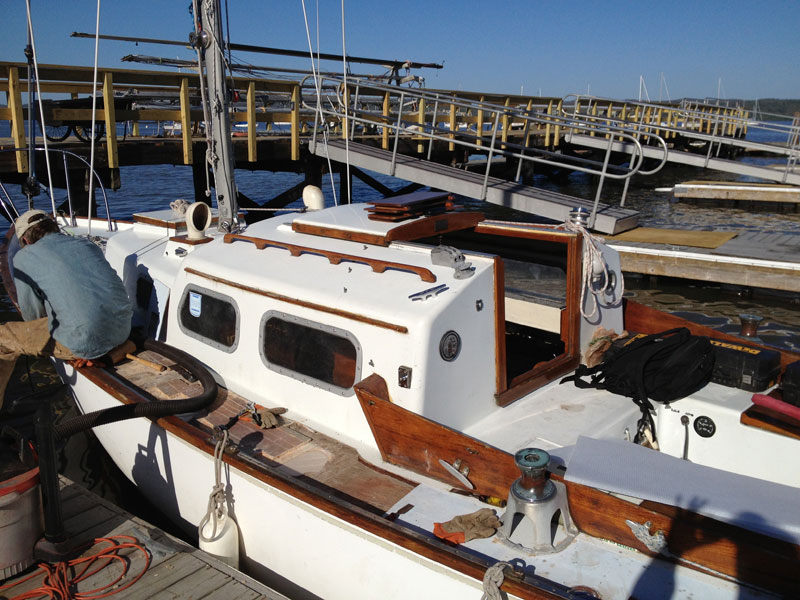
I wish I had more pictures of how it went gluing the old skin back on but it was already day 3 for me of working on this project and the sun was starting to get low towards the horizon in the west so I just worked instead of documented. I mixed up the biggest batch of epoxy I ever have in my life for putting the skin back on. It turned out to be a little shy of what I needed so I had to spend more time on day 4 of this project filling the seams with thickened epoxy to cover and seal the whole mess. Unfortunately day 4 happened about a week later and some rain had already found its way into the cracks. About an hours worth of judicious use of a heat gun seemed to dry things out enough for me to proceed.
As of this point I can say that it did not result in a picture perfect job and I still have a bunch of work still to do sanding fair and leveling some of the seams before I even get to repainting with non-skid paint. What I can tell you is that the deck now seems solid, does not leak and the boat still sails well with her clean bottom and propeller.


Nice job. Good to see you opened it up and got right down to the problem. Good for you as you now have something there.
Mo
Thanks Mo.
It is a relief to have her feeling more solid again and ready to sail.
I am somewhat amazed at how many work days (4) went into this not so huge project.
I’m sure the next deck re-core project I attempt will go more quickly and smoothly.
Nice job Caleb! i have been busy trying to get Destinada ready to launch…I was in the water this time last year!
But I have ot say, I have gotten a lot of work done with the extra time we took to get get in…A lot more projects have been completed that has made my wife, me, and Destinada happy!
Freddie,
These old boats just seem to love when we do any kind of work on them. They seem to always add more things to the “honey do” list which never seems to get smaller.
Caleb
In 2010, I bought a little outlet for our boat so that we didn’t have to run the cord for our battery charger out of an open locker. I have yet to install it because I don’t want to cut the hole.
It must take some serious cojones to rip up the whole side deck.
Chip,
I must say that I really did not want to do this but my hand was forced to do something about the broken deck under our port side deck stanchion base. I wish my blog was filled with as wry a sense of humor and observations yours is but I guess I don’t swing that way, yet.
Your outlet/wiring coupling should be a breeze by comparison. If you can make guitars, you can do this. Over drill the hole, clear out core around hole, cover bottom of hole with duct tape, fill with thickened epoxy while wiggling something like a twig or horse hair to get the bubbles out, let harden, re-drill proper sized hole for bolt, backing plate, bed with prodigious amounts of Butyl tape and done. Nothing to it!
No job on a boat is easy.
Eh, I probably could but I probably won’t. Looking forward to some “after” pics of your project though.
Pingback: Practice deck core layups? - SailNet Community
Good job. I have just ripped up my entire deck on my Columbia 36 i purchased last year. I wanted to see how bad it was before I ordered materials. It was bad. After years of neglect up here in Alaska, the freeze/thaw cycle had all but totally saturated and delaminated the deck.
Do you think that the core you used would work for the entire deck? The price in very attractive but I want to be sure that it would be stiff enough for a large stretch. Thanks and I wish I was sailing!
Mark,
Yes, I do think the honeycomb polypropylene core I used would be appropriate to do an entire deck. I should have provided a link to the site where I bought it:
The only caveat is that like with Balsa end grain core you should “pot” (over drill & fill with epoxy) any deck penetrations.
Caleb
Pingback: Drying out the Core - Page 4 - SailNet Community
Pingback: Backing plates, what do you use? - SailNet Community
Pingback: Cored deck soft spot repair - Page 7 - SailNet Community
Pingback: B24 (sailstar model) fix her up or else, HELP! - SailNet Community
Pingback: Spot spots on deck - SailNet Community